Showing posts with label materials. Show all posts

Monday, June 15, 2015

TpT Seller Challenge Week 1: Makeover Madness

Hello! In an effort to revamp my image and get my creative juices flowing, I joined the TpT Seller challenge. Each week we focus on a different idea and complete a task. This week we are focusing on Makeover Madness!

I took a very popular product and totally revamped it! Ta da!


I redid the background from just the pretty borders to the chevrons and black chalkboard design. I also changed the fonts to my newest favorite! Also, to help align with common core (loosely anyway) I added ten frames at the bottom of the number pages. The number pages still feature movement arrows so students can see exactly which direction they should move as well as how many strokes each number really should take. 

The rhyme pages I touched up by keeping the original poems and changed their looks. I also added a few other poems as alternatives to my originals. I know my kindergarten team really liked this pack but they used different poems, so I added them for my friends at work because "sharing is caring!" 

If you want to pick up your copy of this product please feel free to stop by my TpT store {here}. Also, please leave feedback if you do pick up a copy. I can't grow as a teacher-author if I don't get feedback from others! 

Thank you so much, and always remember: every moment can be a learning moment!

Sincerely from TK,
Nichole

Thursday, January 22, 2015

A Wonderful Fundraiser

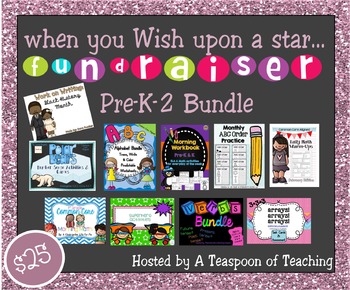
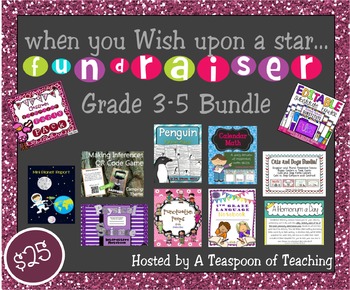
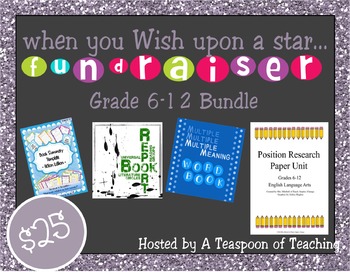
Hello ladies and gentlemen! I am stopping by to let everyone know that a good friend of mine is holding this amazing fundraiser! My friend Melissa from A Teaspoon of Teaching is participating in a fundraiser to raise money for the Make A Wish Foundation! She has put together 3 different bundles targeting 3 different age ranges!

Each bundle is comprised of different products put together by different teachers that teach those grades. (I donated a set of alphabet flashcards) The products, if purchased, total over $70 a bundle, but you can have each one for $25! The best part? All the profit goes directly to the Make A Wish Foundation! You can read more about the fundraiser on Melissa's blog @


or you can click directly on the picture of the bundle and it will take you to her store! This really is a for a great cause. 


There is a K-2 bundle. 


A 3-5 bundle!


And a 6-12 bundle!

Again, EACH BUNDLE TOTALS OVER $70 BUT YOU CAN HAVE ONE FOR AS LOW AS $25! (Have you bought a bundle yet? Cause you really should!)

I hope everyone has been having a great week!

Always remember, every moment can be a learning moment!

Sincerely from TK,
Nichole

Sunday, January 18, 2015

Top 5 Teacher Hacks

As a teacher I am constantly trying to streamline my day and make things easier. Managing a class while working with limited space and only so many resources can be a bit over whelming. Today I am going to blog about my top 5 teacher hacks that have made my teaching experience so much easier. 

1. Clear containers for construction paper

I know they're file containers but I use them for my construction paper. I can see exactly what I have!

Ok, so I don't know if this is so much a hack, as I discovered these awesome containers and I love them because I can store my 9x12 sheets of construction paper in them perfectly. I can see inside and know what colors I have, what I don't have, how much of each color etc. These babies have saved me so many times when I needed to quickly pull out some construction paper for a co-worker, project, or what ever I have planned. 

2. Salt/Pepper shakers for glitter

I filled them up about 1/3 of the way with a color of glitter. I have about 1 set of 8 per table. 

Now, I may be crazy for this one, but it actually works for me and my kiddos. Use at your own discretion! I found a bunch of small clear salt and pepper shakers at the dollar tree one visit and I snagged up as many as I could get my hands on. I bust these bad boys out on VERY special occasions so the kids can experience shaking and aiming their glitter on their glue. They have to share a color (I wasn't rich enough to get one set of 8 for each kid) between about 2-
3 kids. Now, I want to put out a disclaimer. I HAVE VERY RESPONSIBLE KIDDOS THIS YEAR! They have really gone above and beyond to show me they know how to take care of my things, their things, their supplies and the classroom. They know better than to waste glitter by dumping it on the floor, or dumping a whole lot onto their paper and then throwing the majority away. I trust them to use the glitter properly, and we use it so rarely that they know it is a treat. I have not had a problem with my kids this year...ask me again next year and it might be a completely different story.

3. Indoor drying rack

I use clothes pins to "attach" student work to the rack. SAVES SO MUCH COUNTER SPACE!

I cannot gush about this product enough. My sister-in-law bought me an inexpensive indoor clothes drying rack for Christmas and I have used it almost every single day in the classroom. It is a super easy way to have kids dry their work when working with paint or glue. Mine is collapsible, so I can easily collapse it and tuck it away in a cabinet or under a counter and then just as easily pull it out and set it up. It holds 22 8.5x11 pages easily with clothes pins, and depending on the size of the project can hold as many as 44 student work samples. It is light weight and I just love it. I no longer have to lose counter space (of which I have precious little). I have been working with my kiddos on how to use liquid glue properly and this has been a great tool. Before they didn't understand WHY a puddle wasn't ok, other than it was just a waste, now they can see that when they use too much glue their paper "cries" and some of the pieces fall off. It has really cut down on glue puddles and wasting glue. Also, I've had less messy hands because they are using the appropriate amount of glue instead of glopping it on all over the place. 

4. Gallon ziplocs

I label mine for the classroom Monday-Friday and then put my papers inside!

My team lead, and good friend, taught me this trick at the beginning of the year. She has little baskets that are about 9"x12" big (perfect for laying paper down flat in) and she uses one each week. I started out with a basket a day, but when you're planning 2+ weeks into the future it can get space consuming. To help get me prepped and ready for future lessons I turned to my friend and what she said CHANGED MY PREPPING LIFE! She takes a gallon ziploc bag and writes the day on it. One for each day and then stuffs all her prepped materials for the day into each bag. She then stacks the bags (Friday on bottom) into the basket. She can get 6 weeks of planning and prepping down to 6 baskets which takes up half of a cubby top for her! It is genius. I have been stock piling gallon ziplocs because I use them so much. She also showed me that I can prep out my guided art lessons and make a bag specifically for those that can be used year after year after year. Fill the bag with all your pieces and then restock as needed, the bag holds the extras so eventually you wont need to prep for that year/activity. Maybe I'm just behind on this trick but it really has changed my life. Because of this trick I was actually able to plan AND prep almost 6 weeks into the future, allowing me to focus on other things like my intervention groups. 

5. Colored stickers

I used smiley faces, stars, push pin and plain dot stickers to code my library.

Ok...this isn't so much a teacher hack as I just use these darn things for EVERYTHING. In particular, this year I have been having a hard time with my kiddos putting library books away in the correct areas. I'm mildly OCD and my library was the biggest expense to me to put together so I want my books to be taken care of and treated nicely. They also need to be put back rather than just tossed on a shelf. I started with the idea of just putting a colored dot inside the front cover, but that wasn't a visual enough cue for me to see without opening the book, whether or not it was in the correct place. I created color coded labels for my baskets (maybe one of my five should have been little dollar tree baskets) and then placed matching colored stickers on EVERY book that belonged in that basket. Now I have and organized library and I don't have to worry about going and rearranging every week. It's a beautiful thing. My kids kind of think of it as a game. They love to match the stickers to the color label and then show me what a good job they've done being responsible. This is especially helpful during our reader buddy time. Imagine 50 kids all trying to pick out and put books back...before my colored stickers it was a nightmare! Now, I have those 4th graders as well as my little TKs matching the stickers and taking care of our materials. It's a beautiful thing. I do still have the occasional student who doesn't care and just tosses a book where ever they feel like it, but between others "reminding" them about the stickers or others correcting the mistake on their own, I rarely have to do any super big reorganization of our library. 

These are my top 5 hacks so far. They have really worked for me to make my classroom function better or to help keep me more organized. I'm constantly looking for new hacks and creative ways to use products. Leave me a comment below to let me know if you have a hack that wasn't featured. I'd love to hear about them!

I hope everyone has been having a great time in your classrooms and homes. Always remember, every moment can be a learning moment!

Sincerely from TK,
Nichole

Tuesday, November 4, 2014

"Gobble" up the learning centers!!

I have officially posted BOTH my turkey math center {0-20} and my turkey beginning phonics center {A-Z}. The phonics center is free for a limited time! (New products are free for the first 24 hours, then they must be purchased!)

http://www.teacherspayteachers.com/Product/Turkey-Beginning-Sound-Match-A-Z-1537946


Please swing by to take a look and as always, feedback is greatly appreciated!

Always remember: Every moment can be a learning moment!

Sincerely from TK,
Nichole

Saturday, November 1, 2014

Ready for Thanksgiving!

I have a new product listed on my TPT store! It's Thanksgiving themed and free for a limited time only! Please pick up your copy and leave some feedback! Thank you much and I hope you enjoy it!

Check out my store to pick up your copy!

Always remember: every moment can be a learning moment!

Sincerely from TK,
Nichole

Saturday, October 18, 2014

I redesigned my room...a little bit

So...I get bored with  my room fairly quickly...and that has already happened in my Rainbow paradise (as my lovely team lead as deemed my room.) So I rearranged some stuff just recently and wanted to share them with you guys! We'll start with my "new addition"...

I was struggling with how to track my kiddos progression with counting. I had a "race to 50" number line above my board and every kid had a paw print with their name on it (our mascot is the panther...this was the best I could do.) but it was above my board and required me to climb on furniture to move paw prints...plus the race theme looked thrown together and crummy. I changed it to a "Leap frog to 50!" number line that I put on one of my cabinets right by the front door. It's a great visual for the kids to see where they are, AND for parents to see where their student is. They can see the progression and know how high to work with their student on counting each week. I'm LOVING THIS!
This is a shot of the whole thing with student frogs

Each student has a frog with their name on it.
Every student has a frog with their name on it. Each week we set a goal for where we want to be. Surprisingly, the kids are really excited about counting to 50, so they picked their first goal for the first trimester (I was a late hire so my kiddos started a month behind everyone else in the district...and I'm STILL getting new kids because I haven't reached my cap.) Our first goal was to 10. Seeing as how I got a lot of kiddos that couldn't count past 3 when they started...I'd say we did a great job meeting the goal by the time report cards came out! They're already thinking and talking to each other about our next goal. (A lot of them want to make it to 100 by the end of the year...we'll see how far we get.) 

Some great ways to have them work on their counting, aside from the obvious math assignments and curriculum, every morning I have them practice speaking in complete sentences "Hello, my name is _______. My favorite color is _____. I have a pet _____/I would like to have a pet _____." They also practice counting with each other. They get to pick their partner and count as high as they can. If their partner knows the next number they can prompt each other, if not they compliment each other and the other person takes a turn. It builds counting AS WELL as classroom community! Like I tell everyone in my class, we are all friends in here and we work together to make sure we all shine!

I also received MOST of my furniture (I'm waiting on my computers-I have loaners right now from our computer lab- my rug, and a teacher printer so I can print stuff in my classroom as well as some developmental play equipment that I have NO IDEA where I'm going to put...but hey...I'll take everything I can get.) so we have NEW student desks with name tags, MY KIDNEY TABLE (just about cried when they brought that beautiful baby in) and big kid roller chairs. That's right ladies and gents, this teacher has a chair that doesn't put my knees up by my ears! Can I get a hallelujah?! HALLELUJAH!

I kept my desk layout but moved a lot of stuff on my walls...
Our new "Parent News" board!
 I've always had a "Parent News" board in my room. It's an easy way to post things and newsletters for parents to see, without cluttering up my counters and keeping a zillion copies of everything in case parents ask for something specific. I noticed about a week ago (when a parent asked me about our Peek at the Week newsletter) that I *gasp* never made one this year...so after school that was the first thing I set about doing. It's small, but it's there and it has our current information of things going on in class/at school. My parents LOVE this. (I never realized how much parents rely on this board for information....or maybe it's just my parents?)
I received bookshelves that I didn't know what to do with...so they went into my library/developmental play organization.
 The day I received my student desks...I also got 2 big black bookshelves that I had NO WHERE to put! I decided to rearrange my tactile wall and library area to include these new bookshelves. I'm not sure I like it yet, because it cuts off my view of the carpet area when I'm doing one-on-one work at my beautiful kidney table...but I'm sure I'll make it work soon enough. 

Student tables and a piece of my lovely kidney table.
 I spy some BEAUTIFUL kidney table and some awesome student tables! My old student tables were on loan from our preschool classrooms and can I just say what a difference these tables have made?! They're wider so I can sit 2 kiddos across from each other without someone getting kicked or not having enough room to do their work. They're also big enough that I *could* put 3 to each side...but why crowd them? Now they have enough room to spread out and keep their little crayon box next to their name tags. No more "Mrs. P...this kid is touching me!"
I love my elmo and projector.
 A LOT of people have asked me why I put my elmo and projector at the back of the class and I have one simple answer...I can watch everyone while doing the guided practice or the example on the board with them! I don't like not being able to see what I'm doing...and with my back to the board I feel like I can't see what the kids see...and it is just awkward to have to turn around to check that they can see exactly what I'm pointing at or where I'm working. This is just so much more simple for me.
Missing a rug...but our learning carpet area is almost complete!
 The kids have access to everything they can use for play time and I have access to everything I need to teach. This setup (albeit a little blocked off from the rest of the class) is amazing and really helps get the kids to understand "This is where we learn."
Our new entrance with our Leap frog to 50 number line.
 Kiddos come in, hang up their backpacks, put their folder in their cubby and then sit down to do breakfast. It makes for morning routine to go VERY smooth. Honestly my kids are so set in our routine already (30 days into the school year) that parents are astounded that the kids say bye and go about their business. No tears, no fussing. My parents have even, playfully, complained that the kids just go on without them...they're growing up too fast.
Technology nook
 This is our technology nook. I put my classroom rules on the divider walls for all the kids to see, and the number posters (from my number posters pack) on the wall too. The next 2-3 weeks will be spent REALLY establishing number recognition 0-5. I've introduced the number, but have had so many new kids start, and some kids leave that I don't feel like we have a solid understanding. So before jumping into number 6-10 I'm going to make sure we're solid on 0-5. I'm responsible for recognition up to 20...so I think spending some time reteaching 0-5 will be good for when we get to higher numbers. 

I don't know if anyone can see it, but we've also got some words on our word wall. The kids can't really read them but they're history vocab that I really try to get them to recognize by sound (I say the word and they tell me what it means) and I will be adding the colors as well. I don't like adding words when the kids are around because I have to stand on the computer counter...and that's a big no-no when kiddos are around, so adding words is a hassle (hence the reason I'm not regular on doing it.)
My front wall with our new BOOK BAGGIES!
Our new front board. It looks so bare now, but I'm sure I'll add stuff to the wall sooner rather than later. For now I've added our book baggies. I use these alot during our UA (universal access) time. The kids usually have a worksheet they work on and then when they finish they have to grab 1 book out of their book baggy before they can do developmental play. They are responsible for coloring the pictures and tracing anything that might need tracing. These books go home for parents and students to practice reading together. I want to put a disclaimer out there...I'm a TK teacher...my kinder team has told me to get them ready for reading...but DON'T have them reading fluently by the end of the year. They don't want bored kindergarteners and if I teach them EVERYTHING (adding, reading, writing) they will be super bored and it will just make life miserable for teachers and students alike. So I am really pushing that the kids HEAR good reading, rather than practicing the reading themselves...at least for now. 

I love my room...and I'm excited to see how it grows, changes, and becomes more like home through out the year. Thank you for joining me on this (long-winded) tour of my room.I hope to see you soon.

And always remember: every moment can be a learning moment!

Sincerely from TK,
Nichole


Wednesday, October 1, 2014

White boards DIY style!!

So, I requested whiteboards from my district, and they said they would order me a set but it would take a while for them to be processed and brought to me...and I wanted them NOW (I'm impatient) because I want to use them with my kids to really teach them number sense and ten frames.

Anywho, I decided to hit up my local hardware store (I am a die-hard Lowes girl personally) and I found a sheet of whiteboard material 32inx4ft for likee $12. (There was a larger sheet of 8ftx4ft for like $14 but it was recommended to me to get the smaller ones instead. To each their own.) 
This is the large sheet that I took a picture of

I bought 2 sheets of the whiteboard (the smaller sheets) and the lovely Lowes person, who stayed with me through the waffling and switching materials only to switch it back, carefully cut it down to the size I wanted. I went with 12inx10in squares and I got 24 our of the two sheets. If I had been thinking clearly I would have gotten the bigger sheet and gotten 12x12 squares but it was after a long day of teaching (and subbing during my prep hour for another teacher who was at a training) with very little coffee...and I was hungry, so I didn't go that route. 

Once cut the stuff collects dust like nobody's business so I used some swiffer dry cloths to collect the dust before I taped up the edges. I bought blue duct tape for the edges. You don't HAVE to tape the edges. I did because I thought it looked cuter and the edges of mine were a little frayed and dusty (and we all know how much of a perfectionist I am.) Duct tape now has neat patterns and colors and even TRIM ROLLS! Little rolls that are about half the thickness of regular duct tape that you can use for trim on decorative projects! Who would have guess?? I did not realize this was a thing...so don't laugh at my out-of-the-loop-ness.

I went with a nice solid blue of the regular thickness and, because of the quantity of my boards, went with the 20yd roll. I cut strips long enough for each side and then ripped it down the middle to "thin" it out. Twice the yardage for the same price! I'm all about saving the $$.
 

I worked on a TV tray for this project because I got to watch my favorite show with my husband and "craft"/diy at the same time. Plus the tray made a convenient place to stick my strips so I could quickly do a couple boards before I needed to cut and rip anymore. After I prepped the tape it was just a matter of sticking it to each side and folding it over the back. They're not 100% even, but they're going to a 4 year old...I think I can live with it (at least until Christmas when I can take them all home and do them again with a cuter tape and making the strips even.)

What I started with...
The final result.

This was a super easy, rather quick (aside from my indecisiveness it really only took me about an hour to an hour and a half to tape all of these up) and REALLY inexpensive project. I now have a class set of whiteboards for $25! Best part is: You can totally customize it how ever you want! Change the tape color, change the size. Make it work for you! 

P.S. This board will "ghost" so some windex or a magic eraser is perfect for cleaning it when it gets grungy. 

All in all I love the way they came out and I couldn't be happier about how easy it was on the wallet. I hope some of you find this helpful!

Always remember: Every moment can be A Learning Moment.

Sincerely,
Your TK teacher
Nichole


Related Posts Plugin for WordPress, Blogger...