Hello friends!
Some really great and exciting things happened over the summer. I went to a Summer AVID Conference. I got to travel. But most exciting was...*drum roll*
I got to set up my classroom with my good friend and team lead so that we could room share for the entire 2016-2017 school year!! Isn't that exciting? (Listens to the crickets chirp in the background.) What? You mean you don't get excited to share your room with another teacher??
Well, if I'm honest, I wasn't either, but then my partner and I sat down and kind of hashed out how we wanted the room to look and how we wanted everything to go. After that, I was a lot more excited! (Being completely honest here.) So today, you get to see how we made our tiny room work for two!
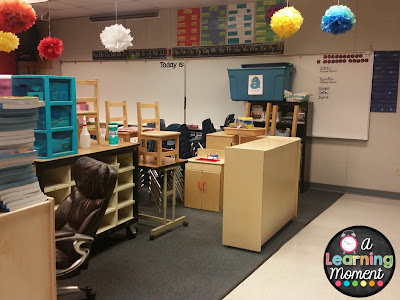
So we started with a room that looked like this...
and morphed into a cohesive blend of both of us!
It's a small classroom but with a few tweaks and tricks we've really made it work for us! Here's how we did it.
First: Designate your special "teacher spot." This is key. Neither one of us really like having a desk (nor do we really have room for 2 desks and 2 horseshoe tables) so we opted for simply having 2 horseshoe tables that we use for small group instruction and as our personal work space. Mine, (the mess that it is) looks like this...
And hers looks like this...
Second: Designate "common work places." We have one area that we use to work with the kids and we had to decide how we wanted it set up. We ended up using this rolling storage as our teacher work space where we project pictures and hook up our computer. It looks like this:
Third: Designate "student work spaces." After we had our teacher areas figured out, we positioned the student desks and the carpet area around them. (Luckily, most of the furniture stayed the same from previous years so positions weren't that difficult.) We wound up with areas that looked like the picture above!
Fourth: Designate "centers" or "play areas." Now this, admittedly, was the toughest part for us. Our room is small, and we took everything that was already in the room...and ADDED TO IT! So we kind of had to place the play areas where we had space.
We wound up with a room that fit our needs perfectly for the year!
Wall space was another conversation, but luckily there is quite a bit of wall space in our room. We split the boards 3 and 3, then set up our calendar wall. We have a large "theme board" that is split down the middle so we can display our themes as they change.
 |
| Kindergarten writing board |
 |
| TK Art, Writing, and Math boards |
 |
| Split theme board |
Now, these steps can be done in what ever order you see fit. This was just the order we felt was the most beneficial for us. When setting up your classroom, it can always feel extremely overwhelming. My best tip: take it piece by piece. Don't be afraid to move things around until the big picture fits the picture in your head.
I hope you found some of these tips helpful! And always remember: every moment can be a learning moment!
I hope you found some of these tips helpful! And always remember: every moment can be a learning moment!
Sincerely from TK,


No comments:
Post a Comment