Showing posts with label science. Show all posts

Sunday, March 27, 2016

Hello Fairy Tales!

Hello!

So we've been super busy in the classroom recently, getting ready for Open House and then Spring Break (which I am currently on) but that still isn't an excuse for being so distant from here! So I've written a few blog posts and will schedule them to post fairly regular so you wont be without some fun news from our classroom!

Anyway, I'm here to talk about my favorite unit that we have covered so far this year (it's actually my favorite that we cover all year long) : Fairy Tales!! My Littles and I have spent that past month learning all about fairy tales and folk tales. We did so many fun activities that came out so awesome!

We started our unit off with talking about common "rules" for both Fairy Tales and Folk Tales. We named specific stories that followed each rule, and then made a big poster showing the rules we needed to classify new stories we were going to read!


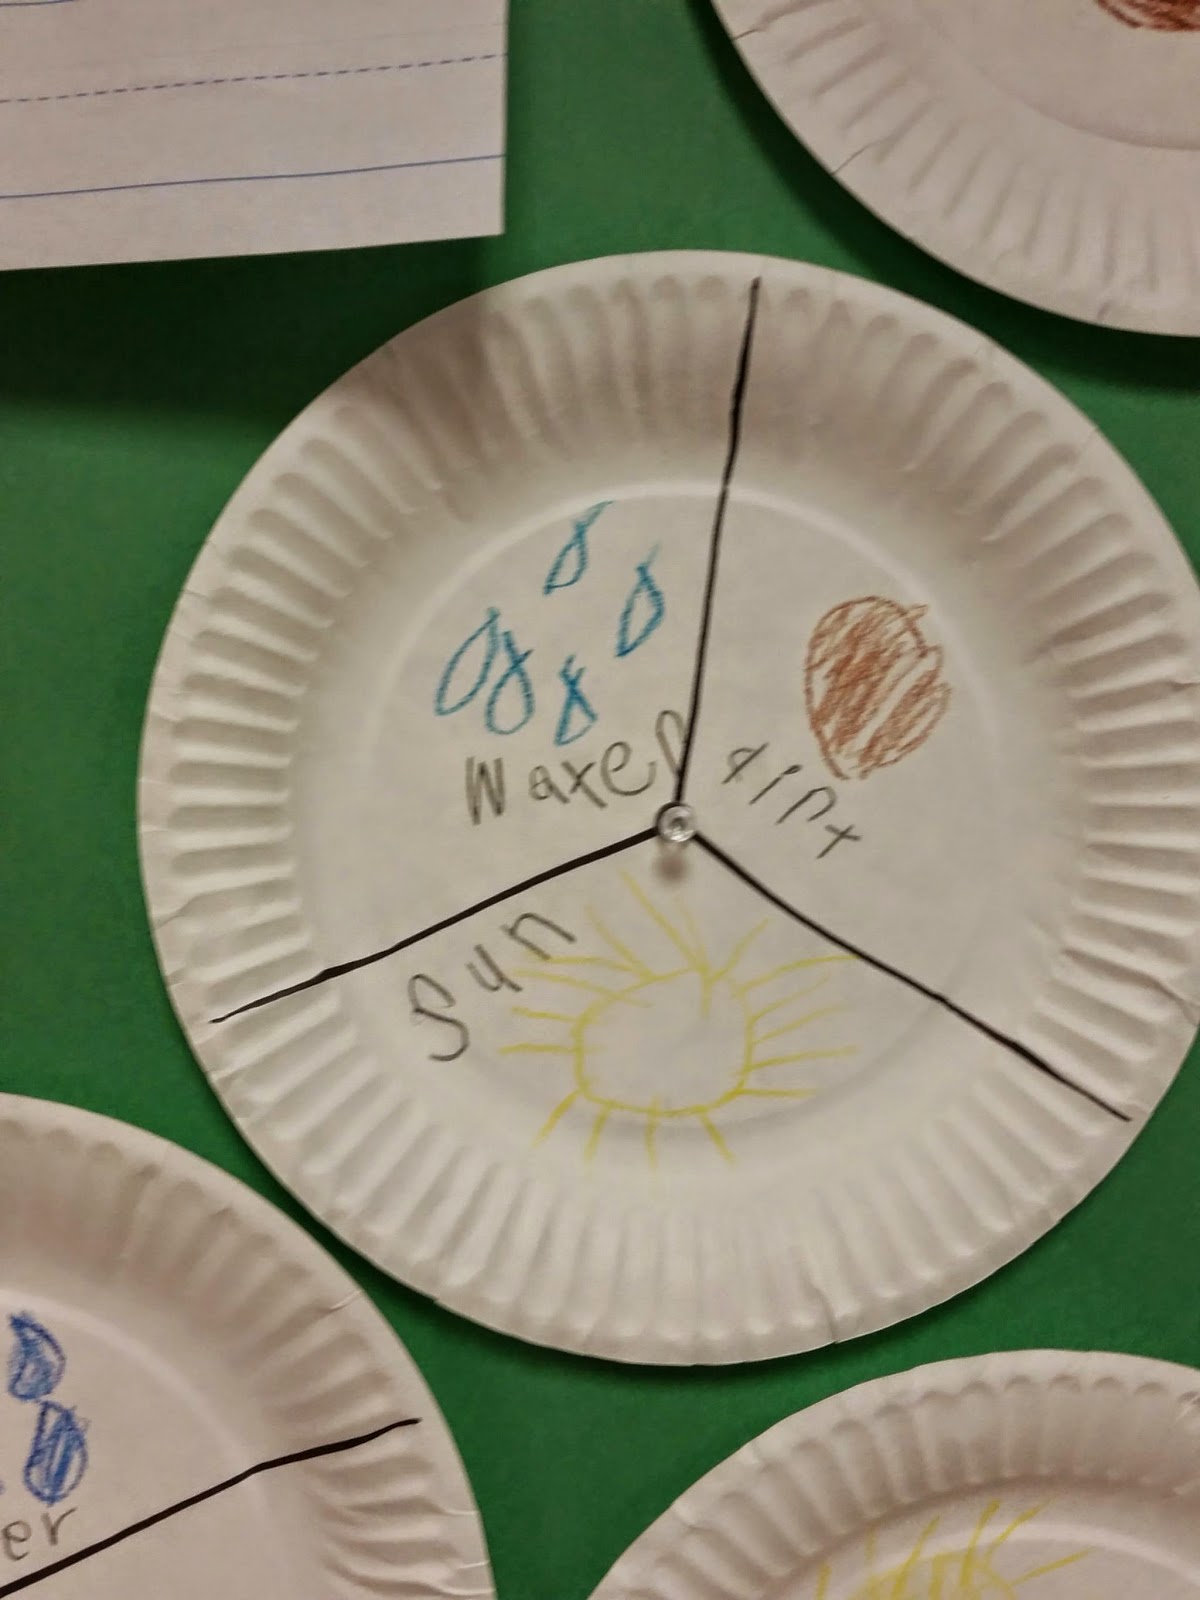
The first story we read was Jack and the Giant Beanstalk. This was the perfect way to kick off our unit because the kiddos got to do some science (which seems to be their favorite subject) and they had a "take home" product that parents were really impressed with. We got to grow our very own MAGIC BEANS! We started with a big chart and discussed the three main things our magic beans would need to grow: sun, soil, and water.


The kiddos replicated the chart on a paper plate that I divided into three, and I put that up on our science board. The next day we planted our very own magic beans.


I learned early on that I cannot grow anything to save my life if I have to worry about watering it every day, so now any time I have to grow something for the class I follow this method. I place dry soil in a Styrofoam cup punch a hole in the middle of the soil about an inch deep, place seed in the hole and then lightly cover. (The kiddos did all the this in class.) Then I put some water in the cup until the soil is MOIST, not muddy! Now, here is my trick for making things grow. I take a square of plastic wrap and lay it flat over the top of the cup and then rubber band it to the cup. This creates a greenhouse that will self-water and hold in the heat! I place all the cups in a plastic container and then place them in the sun every day. That's it folks! I don't touch them at all, except to pull them into the classroom for the night. This is how they turned out!


We read Cinderella next and talked a lot about what it might be like if we had a Fairy Godmother. We talked about the wishes we would make, and many students were actually quite concerned about whether or not they could use wishes for other people! I had a bunch of my littles share with the class what they would wish for with a Fairy Godmother, and many asked for toys, some asked for things for their family, and others asked for things for their friends. They were all really excited to share and it made my little teacher heart happy! We did a guided writing assignment (my early birds did one sentence, and my late birds do another) and then completed the craftivity that went with it. My kiddos got to pick the color hand they wanted and the colors for their "magic burst" behind their wands, so those aspects are 100% individual to each student.


 My early birds came up with the sentence "I would do magic." They helped me spell everything, and I wrote each letter down just as they told me to spell.

Right now they have select sight words they need to spell correctly, and then they need to focus on the beginning and ending sounds of words. I think they did pretty stinkin' awesome!


My late birds chose to write the sentence "I would give presents." Many students wanted to give presents to specific people, but trying to write so many different people got really complicated so we just settled on giving presents in general.

Again, they are focusing on the beginning and ending sounds with the select sight words being spelled correctly.


After all the writing and gluing was done I went back with glue and glitter and I glittered EVERYTHING! It came out super cute! (Although, I'm still finding glitter all over the room, and the night custodian that cleans the kindergarten wing still hasn't forgiven me. Haha!)

The next activity we worked on was a compare and contrast activity between The Three Little Pigs, and The Three Little Fish.


This was the version of The Three Little Pigs that I read to my littles. It was the perfect way to introduce folk tales since it so clearly followed all the special rules we were looking for.


This story is so adorable! (**I am NOT sponsored to promote this book at all! I just love it and I use it every year when I do this unit.) It mirrors The Three Little Pigs and is a great way to get young thinkers to compare and contrast two stories! We did a quick compare of the stories and found ways the stories were the same, and we did a contrast to show how the stories were different. The typical differences were the settings and characters since one takes place on land and one takes place in the sea. My littles LOVED talking to each other about the differences between the two stories.

After we compared and contrasted I had my kiddos complete another craftivity that related to each book. 


My early birds completed the Three Little Fish craftivity and my late birds completed the Three Little Pigs craftivity. I gave each student actual pieces to identify the materials used to build the houses in each book. I did substitute a few things that I couldn't get a hold of in time (i.e. seaweed and hay/straw) so I used green tissue paper cut into wavy strips for seaweed, and I used yellow present stuffing to simulate straw. If you have those materials available you can use them, although I don't know how seaweed would do with the glue or if it might start to smell. If you try it, let me know how it turns out!

The students again focused on phonetic spelling. Straw, Sticks, and Bricks.
Phonetic spelling of seaweed, sand, and wood.

Our last big activity we worked on was actually inspired by an AVID lesson I did for some district higher-ups. I have a big theme board that I decorate with every new theme we do. For our AVID lesson I had the kiddos work together to create a castle out of large shapes that had been cut out. They did a great job. The next day I gave them individual sheets of paper and they had to do it on their own. Each castle was unique and beautiful and the kids had so much fun. When they were done creating they needed to come to me and identify how many of each shape they used to create their castle. 

**Note: We focus on the four basic shapes: square, rectangle, circle, and triangle, so those are the four shapes on my write up. If you do more, you can always add more or have them verbally identify them!

Here is the large "theme board" that proudly displays their AVID creations as well as their individual creations.
As you can see, they all did a wonderful job! Here are a few up close looks at some of the student works:

 They are a little blurry but the write up says "To make my fairy tale castle I used ___ squares, ___ rectangles, ___ circles, and ___ triangles." The kiddos were expected to count each shape and then write the number in the correct blank. My kiddos were expected to create their own circles, and for beginners (some of these littles have never even looked at scissors before much less cut with them) I think they did a great job of trying to cut out some circles from some rectangles and square pieces!

I did a few miscellaneous worksheets to tie in Rapunzel, Goldilocks and the Three Bears, and the Princess and the Pea, but weren't nearly as exciting or as engaging as these fun activities.

Well, I hope, if you are ever in the mood for some fairy tale activities that you give some of these a try! My littles loved them and I know yours will too! And I hope, above everything else, that you always remember: Every moment is a learning moment!

Sincerely from TK,


Thursday, March 12, 2015

Fairy tales

We have been working on Fairy tales all month. We have read a wide variety of fairy tale and folk tales and the kids are having a blast. The first activity we did was after we read the books The Three Little Pigs and The Three Little Fish. The students had to identify what each house was made out of for the different stories and we wrote the name of each material and glued a sample over the house. The kids loved this activity and the parents loved looking at this during our Open House this week. What do you think?
 

After that we read Cinderella, and did some independent writing. The kids were asked to think about what they would do if they had a magic wand. Their answers were really touching. We worked together to inventively spell different words. I think they came out great for some of their first independent writing for the year.


I will make everyone happy.
I will do magic.
For our art we worked on "collage"-ing and mosaics (kind of) with our stained glass castles! The kids had to glue tissue paper over the picture of the castle and then they needed to carefully spread a layer of glue over the top of their art work. The kids loved, loved, LOVED this activity and I cannot wait to do it again for our butterfly unit. 

The next fairy tale we read was Jack and the Bean Stalk. The kids had to sequence the story and they learned about what Jack's magic bean needs to grow! 

Our sequencing board

Hello Science! This really leads into our next unit and the kids really enjoyed figuring out what Jack's magic bean needed to grow! 
Teacher poster!


I have a couple other activities we did that I will add once I get my pictures loaded onto my computer! I hope you enjoyed and maybe find some ideas you can use in your own classroom!

Always remember: every moment can be a learning moment!

Sincerely from TK,
Nichole

Sunday, October 26, 2014

The pumpkins are coming! The pumpkins are coming!

Ok, so I think I may be the only person on the planet that gets THIS excited about pumpkins. I know, I'm silly, but for me...it's the little things in life you just gotta enjoy and for me it's PUMPKINS! (Really I love all my units of study from now until the end of the year, but this is the start of it and I'm just SO EXCITED I COULD BURST!)

My kiddos covered the life cycle of a pumpkin for this past week and boy did they do GREAT at it! I have to put a disclaimer out there...I HAVE THE BEST BUNCH OF KIDDOS EVER and they make my job super easy and fun. We started off with the plant unit last week to kind of lead into this unit (I totally planned it that way! No really, I did!) and that helped when we got to the different stages of the pumpkin life cycle.

We started the week with a big chart paper and some pictures from a pumpkin mini unit I downloaded from Mrs. Ricca's TPT store here! For my advanced students (who are working on blending and reading) they helped me spell out different words as we worked through our chart.


After we put the life cycle in order and filled in our chart, I taught the kiddos our life cycle song with the motions. (I wish I had video but alas...I did not think ahead!) It's to the tune of The Farmer in the Dell.

The seed becomes a sprout.
Hi ho did you know...
The seed becomes a sprout!

(repeat tune with each life stage)

The sprout becomes the vine.
The vine becomes a flower.
The flower becomes a pumpkin.

Hand motions:
Seed = fist with all fingers curled into palm
sprout = pointer finger extended like counting the number 1
vine = make a flat "shelf" with arm and hand all straight and parallel to the ground
flower = extend fingers like counting 5 or giving a high five
pumpkin = both hands in front of you pretending to hold a pumpkin (or a ball)

My motions were all created on the spot last year, but they worked for me so I reused them. If you have better ideas I would LOVE to hear them. I'm all for cute motions to help the kiddos learn.

Tuesday we did our pumpkin craft. OH MAN! Be prepared for the cuteness that my kiddos created!! (I think I'm biased, but meh I'm allowed.) I cut 6 pumpkin shapes for each kid in my class out ff orange construction paper. I then passed out a sheet with all the stages on it so the kids could cut them out. Before we did anything, we sang the song again so the kids could remember what we had focused on the day before. I hung the completed big poster up on my white board and then we began the craft. Now, I was VERY specific with my kids. Even down to asking them to find specific colored crayons and hold them up, so I could keep everyone on the same step and the same page. Once we colored everything I had them cut them out and glue each step on to the middle of one of their pumpkins.


From here, I planned to have the kiddos glue the pumpkins together...but we were using liquid glue which takes FOREVER to dry so instead I had the kiddos fold their pumpkins in half and I went around and stapled them to make our 3-D pumpkin!


 Adorable right!? Well I hole punched them and hung them from the ceiling above each kiddo.


 Tuesday we "read" through the pumpkin life cycle book that came with this mini unit and the kids got to color the pictures and take the book home. Thursday I planned on giving the kids a sentence strip and the stages again and then we would put the whole project together step by step, to really help them understand the stages...but on a hunch...I handed them all the materials and said "Ok guys...I wanna see what you know. Can you color these the correct colors and then put them in the right order??" I did leave the big poster up on the white board, but all I did was walk around and monitor to see if they really understood everything. I am proud to say...ALL BUT 2 OF MY KIDDOS DID THE PROJECT 100% ON THEIR OWN AND 100% CORRECTLY!!

I nearly squealed when I looked at them to see if there were enough of them correct to put up on the board. Out of 17 kiddos 15 did it perfect (granted some put them in order from right to left instead of left to right, or the pictures are upside down...but hey THEY'RE 4! That's really good for that age, with little to no direction!)
Here are the finished products!


What a great way to end! Like I said, I had planned on doing this activity together and then having them do it on their own on Friday, but rather than go back and rehash I let them come up with their own way to tell me about the pumpkin life cycles. A lot of them just sang the song I taught them, but one little boy (a little guy that is working on reading and blending already) actually came up with full body motions for the song. He curled up fetal position on the floor for seed, stuck his arm up into the air for sprout, Stuck both arms in front of him for vine, stood in star position for flower and tried to make himself a big ball by touching his toes for pumpkin. Oh my goodness, it was adorable. (Again, I wish I had video, but alas...not thinking ahead again!)

I can't wait to start our "Halloween" unit with our Pumpkin Olympics on Friday! We have some pumpkin math planned and some pumpkin science! Oh man. I'm so excited!!!

I hope everyone is having a blast in their class as well. 

And always remember: Every moment can be a learning moment!

Sincerely from TK,
Nichole

Saturday, October 18, 2014

All about plants!

As a preview to lead us into out pumpkin life cycle unit I did a plant unit. I actually had a science workbook that has a chapter all about plants so I was lucky enough not to have to create my own! The kids had such a blast with this little mini-unit we did all week. 

Monday we started off with a BIG poster that we did together during our carpet time.

Yes, I know 'leaf' is easier than 'leaves' but I made the thing pointing to more than one, so when the kids said "Those are leaves!" I couldn't argue with them! Smart little kiddos! I introduced the concept of phonetic spelling (my kids are still trying to learn all their alphabet letters so this was more for my advanced students who know the sounds and letters already) and we spelled plants and stem together. I also worked on color identification by holding up the marker and having them tell me what color that particular part was. Apparently, light colors are called "baby" colors. So light blue is baby blue, baby pink, and in our case it was baby green. Adorable! 

After we did the poster together they stood up and we did little motions to help us learn what each part does. We would echo each other for the chant but here it is with motions (as best I can describe):

My roots hold me to the ground (point to feet and make a strong grabby motion with hands.)
My stem makes me stand up tall! (Hands on hips in superhero pose.)
My leaves give me food! ( jazz hands out to the side and make a sweeping motion to the mouth.)

It's so stinking cute when they do it. I just look like a fool but they rock it during carpet time!

Tuesday we did our science notebook page where they had to color their plant parts the correct colors. (Mrs. P didn't read directions very well the day before and her big chart example was backwards!) The did an awesome job with it ALL ON THEIR OWN!

 I think they did a GREAT job coloring inside the lines! Our coloring rules are REALLY starting to work!
Silly I know...but this little guy finally wrote his name ON HIS OWN!!

I posted the finished papers on our science board and the kids were so excited to show mom and dad when they came in the next morning. 

Wednesday (you can't see it) they had to draw their own plant on the back of their science notebook pages. It REALLY gave me a clear idea of who understood the different parts and who didn't. We did our dance/chant again to finish off the lesson. 

Thursday we did a nature walk and they got to find all the plants on campus and point to the different parts. The roots of most plants were a bit of a challenge because they wanted to rip up the plants to actually SEE the roots, but I can proudly say not a single plant was harmed in the making and learning of this unit!

Friday was our craft day. Now I was nervous about this part because it was complicated and a bit tedious but I plugged along and they turned out really cute! We made plants from straws pipe cleaners and paper leaves!

I got Starbucks straws and cut them in half to use for stems. Everyone received a straw, some brown pipe clearners and 4 leaves. The first thing we did was push the pipe cleaners up into the bottom of our straw. Then we filled our straw with glue to hold the pipe cleaners in. The kids rolled and pushed some green tissue paper into the other end to "cork up" the other end so glue wouldn't spill out everywhere. From there I used a glue stick to put glue on their straw and they had to stick their leaves on their straws ( I went back with white glue and glued the leaves on after school because they kept popping off!) Here is the finished product!


My students will be taking these home on Monday to show their moms and dads. They are really excited to start our pumpkin unit! Hopefully I'll have more pictures for that unit than I did for this unit. It's a lot more involved. We do a science experiment to see if pumpkins sink or float, we do ten frames from the seeds, we stick letters to individual pumpkins, we count how many cubes tall our pumpkin is, we even do a sequence of the pumpkin life cycle on a 3-D paper pumpkin. So much fun and all in time for Halloween! I can't wait to show you our Pumpkin Olympics! Anywho, that's another blog post for another day.


I hope your classes are having as much fun as we are and your kids are enjoying the season too! 

Always remember: any moment can be a learning moment!

Sincerely from TK,
Nichole
Related Posts Plugin for WordPress, Blogger...